Get your scroll wheels all lubed up (gross?), this is gonna be epic...
This entry is dedicated to a deconstruction of the sick loading screen you saw in the background, for the edification of whoever. I always find it amazing how complex these major Photoshop drawings get, with dozens of overlapping layers that each have their own small purpose that integrate to form a cohesive whole. Besides being maybe educational, I always enjoy seeing things broken down. Maybe you guys do, too.
Background: What's Old... is Old.
The purpose of this drawing is to make an updated version of our old Angels 22 loading screen, which served its purpose, but looks a little dated:
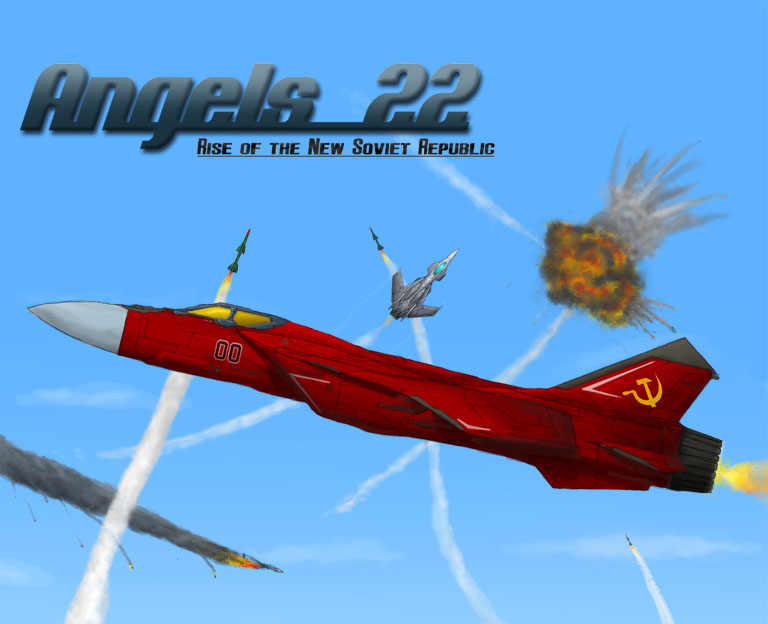
Okay, for serious, this hurts my soul.
Layers; Hellz to the Yes.
I think figuring out what layers do and how they work is probably the most important aspect of learning Photoshop. In that vein, I've broken down this drawing into layer groups, little folders that hold the individual layers.
What is a layer?
So... what is a layer? Well, anything, really. The nice thing about layers is that you can separate everything, which gives you freedom you never knew you were missing. The basic idea I'll illustrate by breaking down that sick explosion in a minute. Don't worry, we'll get to it in due time.
A simple example is a drawing of say... a boat. I dunno. Just a boat, with no background. How I would do it is break it down into basic layers: lines, color, shading. Having those three things on separate layers might seem kind of strange when you're used to using legacy tools like the paint bucket, but makes a whole lot of sense once you get used to it.
Having the lines on a separate layer means you can erase stuff like unnecessary details without worrying about refilling the color around the lines or redoing the shading. In MS Paint drawings like those you'll often see us use for sprites, color and shading are I fact the same thing. A blue gradient would be composed of one row of light blue pixels on top, followed by a row of darker blue, followed by a layer of pixels of an even darker blue.
Using a separate Shading and Color layers allows you to make that gradient darker or lighter without having to go in and change the individual rows. Same thing for color- you can just change the solid blue backdrop of the gradient. This obviously comes in super handy when making 'new' units or whatever by changing the color. It becomes ridiculously easy (and really cheap, I might add).

Above here is the groups (of layers) that make up the sweet explosiony goodness of the loading screen. The order is important, since that's how what is drawn on top is defined. Note the lone "FlareTrail Over" layer. Not matter how organized you try to be, somethings are just better left out. In this case. it's because while it spiritually belongs in the C-17 Bank folder, it's visually flying out and over Explosion's gray trails. See what I'm talking about? Why yes, I do feel slightly OCD now that you mention it.
To start off the actual stuff, let's review the drawing in question:

Each of those folders above represents one or more of the following parts (some are expanded or compressed for clarity):
MiG

Mk III

Explosion

EDIT: I finished the super-breakdown of this layer group, it can be viewed here (Large Image)
C-17 Cargo Plane Banking

Moar C-17's

Clouds

Background Dogfights

Background Sky

The following describe the specific layers in each folder in all their dizzying complexity. Not for old people or animals. Optional safety warning for Kids.
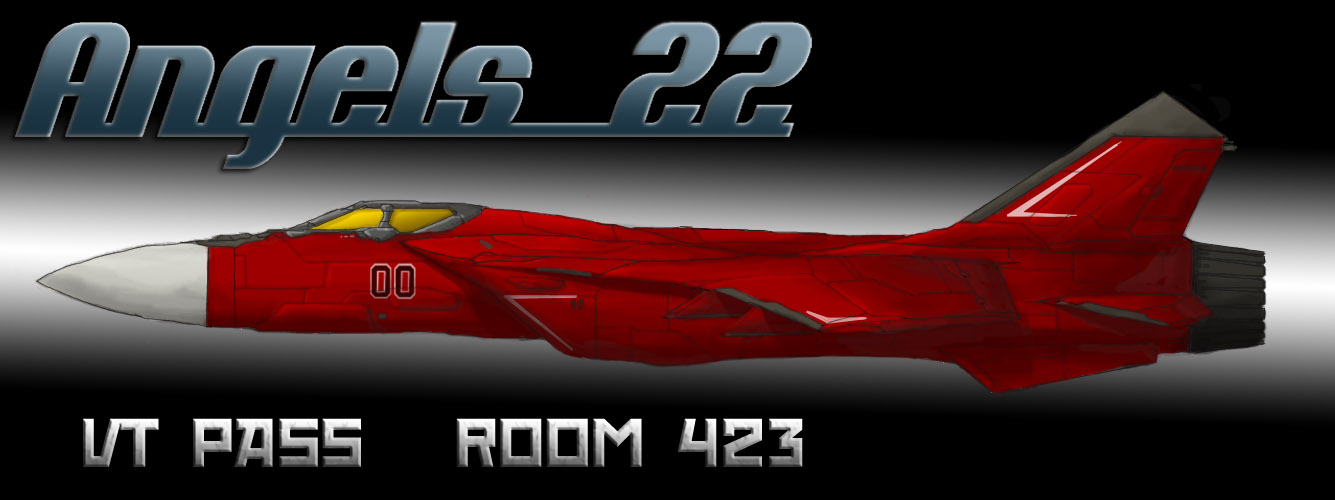
MiG
This is the main jet in the foreground, mercilessly stolen from the previous iteration. It really served as the starting point. I think it looks pretty good considering my current Photoshop version doesn't like to open the actual PSD I had of this. It forced me to use the flattened version, meaning I couldn't individually modify the highlighting and shading layers of the original.
MiG Layers
Highlight- for engine exhaust, semitransparent
Nozzle- Had to redo the original (too dark)
Vapes- Aerodynamic effect
NoseShine- Shine up that there nose
CanopyHighlight- Lots of canopy layers to get transparent effect
CanopyLines- "
Emboss- "
Canopy- "
SickleHammer- Not in original, oops... (you're never really done)
MiG- Main layer, originally a separate .PSD with distinct layers
AfterburnerFlame- Behind MiG, so flame doesn't overlap the jet
Lessons: Even with basic transformations, you can change something to a useful degree. The original MiG's proportions were a little stubby and not quite as sleek as they really should have been. I used Transform (Ctrl-T) and skewed and scaled to get a subtly different airplane that just looks better. You can't really do that if it has a background attached to it. Layers!
All the canopy layers do different things, mostly using layer effects. Throwing just one bevel and emboss on a simple canopy-shape is going to look far too simple. Glass has very complicated reflective properties and essentially has different layers in real life. I remember being amazed as a kid looking out a car window, that my reflection was also there. It was a mirror and a window! Having so many layers also allows just one aspect to be changed without interfering with the others- like if you had the right color but needed to mess with the reflections.
Mk III
This is the player's aircraft, although you wouldn't really know that just by this. There's actually another version of this same airplane that's a custom Ace blue, but feedback on this version (which is in fact retro-ized to look like the legendary Mk II) was much better. The main features in this part of the drawing is that the airplane started it's life as a fairly large hand-drawn sprite made in MS Paint.

Legendary.
This meant that it was rather pixellated, but luckily it was big enough to alter. Rotating a couple times in Photoshop anti-aliased it automatically, and some subtle filters didn't hurt to blend it a little better. Another thing that had to be altered is the fact that the original shading is somewhat ambiguous- it's essentially a perfect (ie, unreal) light source directly from the front.
Mk III Layers
Shock Cone- Uh, looked shitty, didn't use
Vapes- Added for effect, feeling of motion
Afterburner Streaks- More effect...
Afterburner copy 2- See above...
Partisan copy- The original airplane layer with a filter to mitigate the pixelization and flatten the shading.
Partisan- The actual, original airplane sprite done in MS Paint
Explosion
EDIT: I finished the super-breakdown of this layer group, it can be viewed here (Large Image)
The other centerpiece of this drawing, illustrating how cool the horrors of war look sometimes. I mean, the yellow symbolizes the inherent fear one has on the battlefield, the red is the blood spilled for lost causes... blah blah blah...
KER-PERSSCCHHSHKK!
Explosion
Missile Trail- "Hey man, nice shot"
Streaks- Yellow streaks to add some speed to the fireball
Wing- Some remnants of the poor guy in the explosion...
Tail- Other distinct pieces, to show it was an aircraft
Smoke 2- The main layer of dark gray smoke surrounding the fireball
Shrapnel2- Smaller Chunks
Shrapnel-"
Fireball Texture- The original fireball with a filter on it for more texture
Fireball Front- Main fireball layer, all hand-drawn
Fireballback-Since the layer above was somewhat transparent, it need an appropriate colored backdrop
TrailDetail- Highlights and specific shadows for the light gray smoke trails trails
FireTrails- The actual fire of the chunks shooting out the bottom
Trails- The main component of the lighter gray trails
Explosion Trails- Basically more of the above
Contrail- The contrail of the airplane that exploded
Shockwave- The circular shock wave, since(spoiler alert!) that C-17 was actually the pyramid spaceship from Stargate (the movie).
C-17s in the Background
These provide more depth to the image, providing something in front of the sky and the battle in the distance, but something farther away from the Mk. III and the MiG.
C-17 Bank
Flare Core- The shiny part of the decoy flares
Flares- The smoke trail. Yeah, the name scheme doesn't make 100% sense
BankHard- The C-17 cargo plane
Contrail Long- The contrails got a bit complicated since there's four engines visible at one side
Contrail CloseBottom- The contrails coming out of the jet. They are ugly in the middle because those parts didn't need cleaning up (the explosion covers them up)
Contrail Close Low-"
Contrail Close top-"
Contrail Close high-"
C-17
FrontWing- The shiny part of the decoy flares
BackWing- The smoke trail. Yeah, the name scheme doesn't make 100% sense
C-17 Base Copy 5- The C-17 cargo plane
Contrail Copy 2- The contrails coming out of the jet, simpler because there needs to be only one per wing.
Contrail-
C-17 Back
C-17 Base Copy 3- The original sprite, with a posterize filter over it to reduce the amount of detail deliberately (far things are fuzzy in RL)
C-17 Base Copy 2- The original sprite, plane jane from the side.
Contrail Copy 2- Lots of contrails in this drawing, eh?
Clouds
These were challenge from my girlfriend, since she thought I was being lazy just using a real cloud background with a couple of Filters thrown on top. You'll see more about that in the next section.
Cloud
Highlights- The whitest part of the cloud, like the edges of the rufflies. Defines the Cloudy Part layer better.
Cloudy Part- The base part of the cloud, with most of the structure and definition.
Backing- Since the other layers are fairly ephemeral, er, transparent, they required a more opaque backing.
Cloud Copy
Highlights- These layers seem awfully familiar... Okay, this whole group is just a copied and mirrored version of the above cloud. Bummer, dude.
Cloudy Part-"
Backing-"
Background Stuff
This layer is all about establishing both the epic-ness of the battle by showing what we're seeing up close is only a small part of a larger battlefield. It also, uh establishes that we're in the sky. Not space or underwater or whatever. Just the wild blue yonder...
Originally all the dogfighting contrail stuff was made in a separate Photoshop document with each contrail in a different layer. That was because it was a lot easier to use Transform to make all the windy parts without dragging all the other trails together.
BG Stuff
BG Explosion- The little explosion with the trails leading in. It was shocking how fast I drew this. Practice, I guess.
Background Dogfight- One of the four layers of dogfighting. They took considerable rearranging to make them mesh right with the stuff in the foreground.
Contrail Copy 3-"
Contrail Copy-"
Background Dogfight 2-"
Bottom Sky- This is the part that is actually from a picture of a sunset taken from an airliner (not mine). I changed the color and put what I think was the "Paint Daub" Filter on it to make it look less photo-real.
Layer 13- Similar to the above, but with a much more boring original picture. I wanted more texture than just a plain gradient.
BackgroundWhite- A misnomer. Is actually a gradient of blues that form the absolute backdrop for the sky.
Last word
Wow, that took forever to get posted. Oops, sorry guys. I have the extended explosion layer thing which will doubtless be more exciting done, but I'll save that for another journal entry, lest I break the all time Journal-Land record for physical length of a journal entry.
EDIT: Lies!
Oh, plus I'm moving to Denver, Colorado for a few months. I'm leaving before July 1st...


